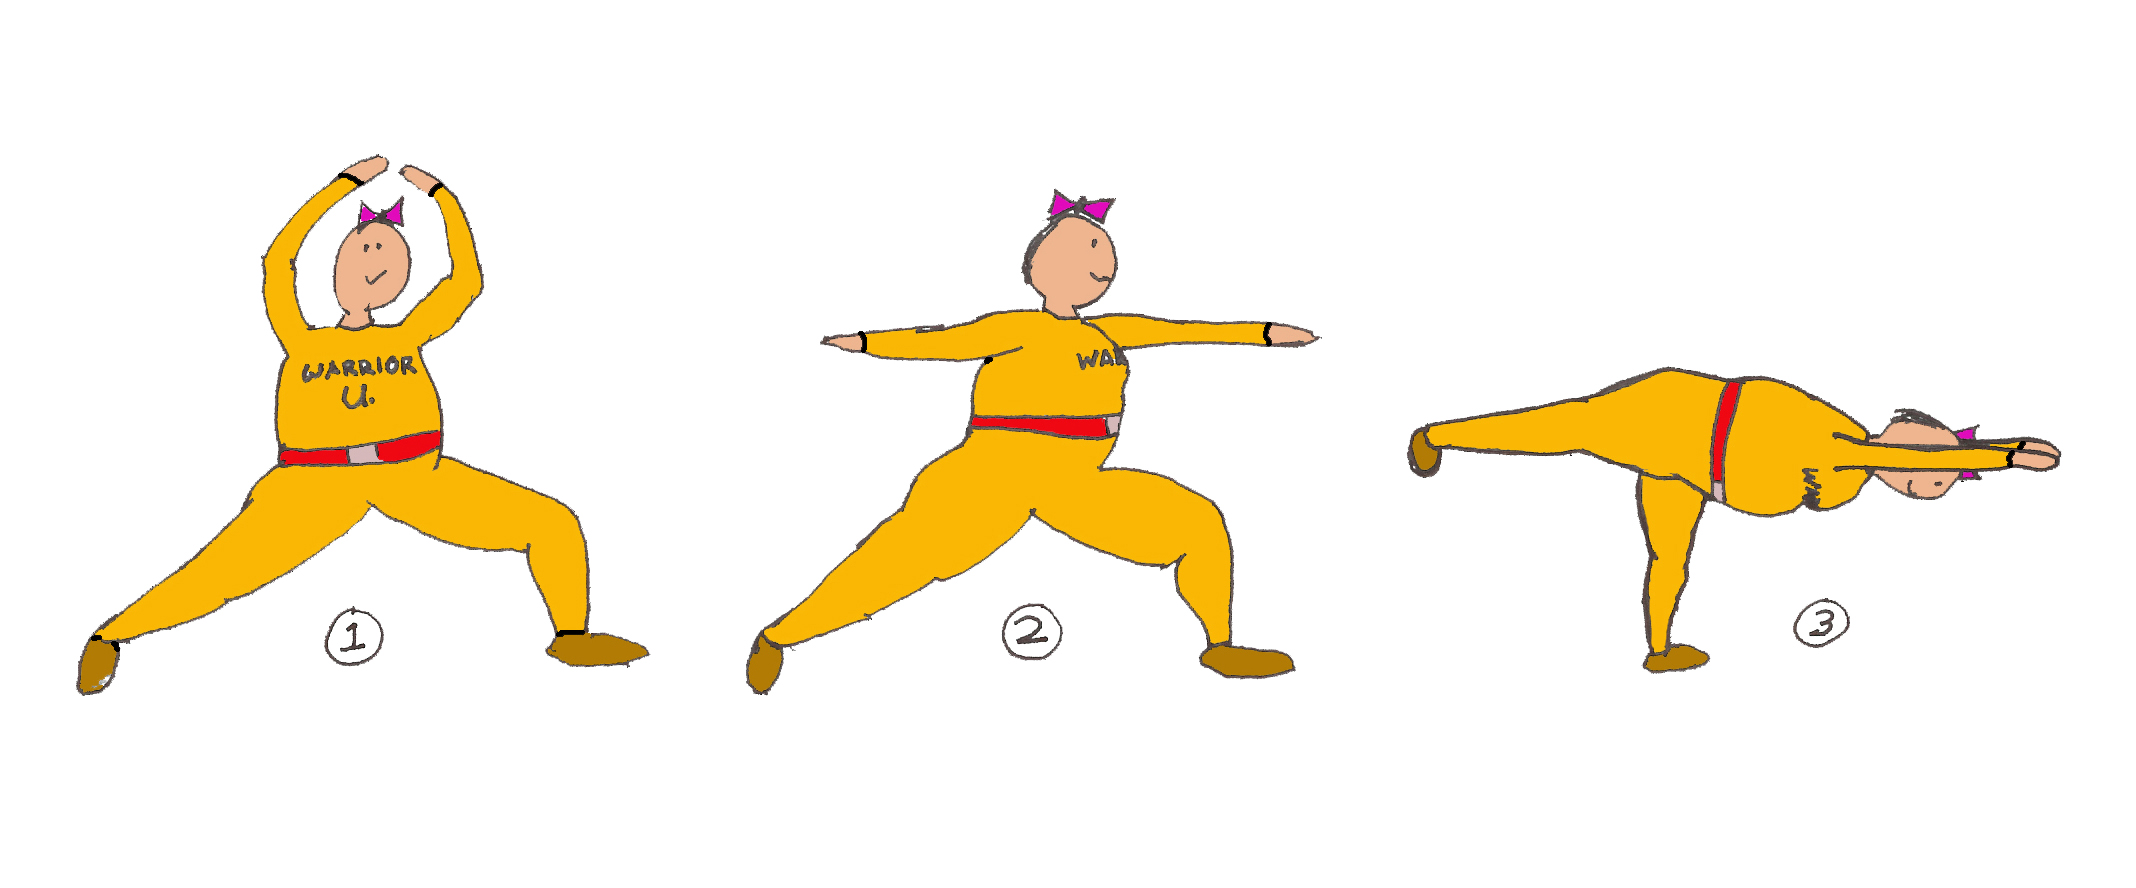
Warrior? Yes, Warrior!
Sometimes life can feel a bit like war and the daily grind can often require warrior-like stamina. Our inner struggle to be the person we hoped can be its own frustrating battle as well. The work your body does in the warrior poses builds enduring strength and encourages grounding. It also stretches parts of our body that stiffens up with normal everyday tensions. There are several versions of this exercise in life and in yoga. In yoga this is called Warrior to promote strength in the personal struggle of self-control and self-efficacy. Here is a progression of the Warrior poses:

Any and all of these are brilliant at building strength and balance in your legs and core (back, stomach, buttocks). The goal is to start with Warrior I and work your way up and into III, either in one sequence or over the course of several months.
A critical safety aspect is to be sure you protect your bent knee always working to keep it as close to a ninety degree angle as possible (and no more). When starting out, do not allow your knee to push forward beyond your toe. More importantly, keep your heel down and always keep the knee in line with your ankle (pointed toward your middle toes). You don’t have to start at ninety degrees either. Work your way down to 90 degrees. For more on proper form of a lunge read this article from the American Council on Exercise.
Warrior pose #1:
This pose begins as a lunge with your chest facing forward. Never let your knee push past your toes. Your arms go straight up over your head as you sink into the lunge. When you feel balanced, you can finish the pose by raising your eyes and head to look up at your thumbs. Hold your stomach in, keep your back flat and remember to breathe. Stretch up through your arms, shoulders and chest; and stretch your back, or straight, leg.
Warrior pose #2:
Stay in the lunge, and now move your arms down parallel to the floor. Turn your eyes (and thus head) to the far wall (facing the bent knee). Try to keep your chest facing forward as in pose #1. Hold your stomach in, keep your back flat, and remember to breathe. A variation on this is to then turn your chest toward to the far facing wall, over the bent knee, and then raise your arms back up over head. Some instructors call this Warrior 1. There is much debate over which pose is one, two, or three – you can make the progression yours.
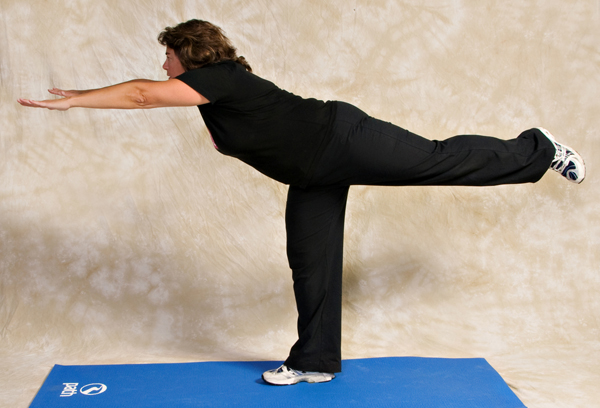
Warrior pose #3:
This is the most advanced warrior. The goal is to have your leg, back, head, and arms make a straight line. Start by raising your leg and arms as high as is comfortable. Also, bend your knee until you feel strong enough to eventually straighten out your weight-bearing leg. This will really challenge your balance. Breathe deeply from the base of your spine and you’ll hold on for a good while.
Here’s what a real person looks like moving into Warrior pose #3:

Again, getting your back flat and making a straight line with your body on top of the supporting leg is the ultimate goal. Good luck with your battles and let us know how it goes!